


Member post originally published on OVH Cloud’s blog by Aurélie Vache
Container orchestration has become a cornerstone of modern application deployment, offering scalability, flexibility, and resource efficiency. It has become common to have to manage several Kubernetes clusters, but to do so efficiently it is useful to be well equipped.
In this blog post we will see how to create a Kubernetes cluster in an OVHcloud Local Zone through Managed Rancher Service.
Managed Rancher Services (MRS)

Managed Rancher Services (MRS), in Beta for now, is based on Rancher, an open-source container management platform, that simplifies the deployment and management of Kubernetes clusters. Managed Rancher Service by OVHcloud provides a powerful platform for orchestrating Kubernetes clusters seamlessly.
Find more information on our dedicated Managed Rancher Services page.
Note: The product is in Beta so you can try Managed Rancher Services for free!
Local Zones (LZ)

This year we also launched Local Zones. Local Zones are an extension of regions that bring OVHcloud services closer to specific locations, offering reduced latency and improved performances for applications.
Local Zones are strategically placed in proximity to areas with high user demand. Their main goal is to minimize the time it takes to transfer data between the user and the cloud, in order to make services faster and more responsive, and meet data residency requirements.
Find more information on our dedicated Local Zone page.
Note: Until 31 August 2024 you can try Local Zones for free!
Kubernetes on Compute instances

At OVHcloud we have a Managed Kubernetes Services solution but you can also deploy Kubernetes clusters on Compute Instances if you want to managed in your own your clusters.
Find more information on our dedicated Compute instances page.
Demo
In this demo we will:
- Create 5 compute instances (3 for the Kubernetes’s etcd + controlplane & 2 for workers) on a Local Zone
- Create a managed Rancher
- In Rancher, configure the instances to deploy into them a Kubernetes cluster (with k3s or RKE2, depending on your needs ans use cases)
Creating Compute instances
First, you have to log in to the OVHcloud Control Panel and open the Public Cloud section. Then access the Instances under the Compute section.
Click on the Create an instance button.
Choose a model (the type of an instance / the flavor, B3-8 for example, but you can choose another one, depending on your needs).
Choose a local zone (Marseille for example):

Choose a distribution (Ubuntu for example).
Select your SSH key (we have to log in our instances later).
Choose 5 as the number of instances to be created and change the name of the instance name (lz-kube for example).
Check the checkbox Public network (to have a pubic IP).
The instances will take several minutes to spawn.
Deploying a Managed Rancher
Still in the OVHcloud Control Panel, click on the Create a Managed Rancher Service button.
Fill a name (my_lz_rancher for example), choose the Standard plan, the recommended version then click on the Create a Managed Rancher Service button.
Rancher instances are pre-provisioned, so your instance will be created immediately.
In the list of existing Managed Rancher Service, click on your instance, then click on Generate access code button to generate the login and password to access to Rancher. Save the login and password and click on Go to Rancher button.
Copy/paste the password in password field and click on Log in with Local User button.
A new password will be generated, save it! Save the server URL too, check the End User License Agreement checkbox and click on the Continue button.
Configuring Rancher to deploy a Kubernetes cluster
Creating a cluster
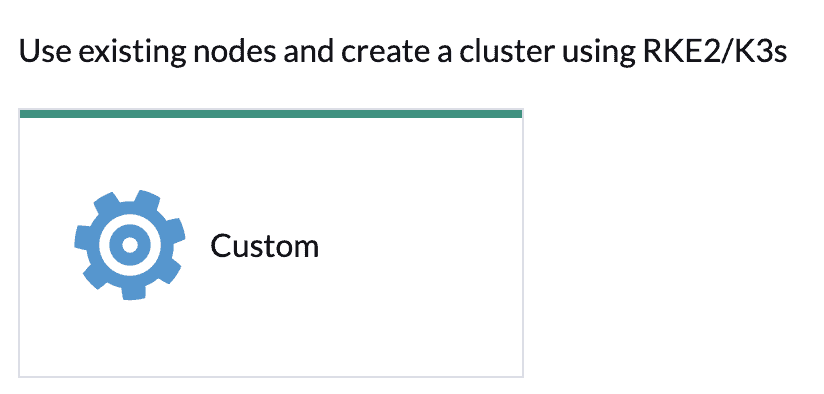
In Rancher UI, click on the Create button and then on the Custom driver:
Fill a cluster name (lz-k3s for example).
In the Kubernetes version list, choose the latest version of the wanted OS. For this blog post we will choose the latest version of K3s, but for production needs we recommend RKE2 instead.
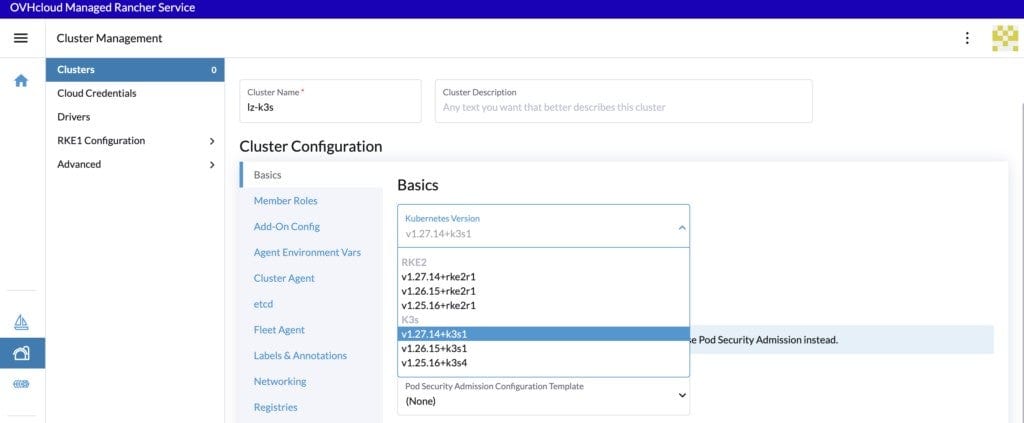
Then click on Create button.
Configuring the cluster
Note:
In Rancher when you configure a node, there are three roles that can be assigned to nodes: etcd, controlplane and worker.
There are some good practices:
- At least 3 nodes with the role
etcdare needed to survive a loss of 1 node and have a minimum high availability configuration foretcd. 3etcdnodes are generally sufficient for smaller and medium clusters, and 5etcdnodes for large clusters. - At least 2 nodes with the role
controlplanefor master component high availability. - You can set both the
etcdandcontrolplaneroles for one instance. - The worker role should not be used or added to nodes with the
etcdorcontrolplanerole. - At least 2 nodes with the role
workerfor workload rescheduling upon node failure.
For the configuration of our etcd + control planes nodes, check only the etcd and control plane Nodes Roles:
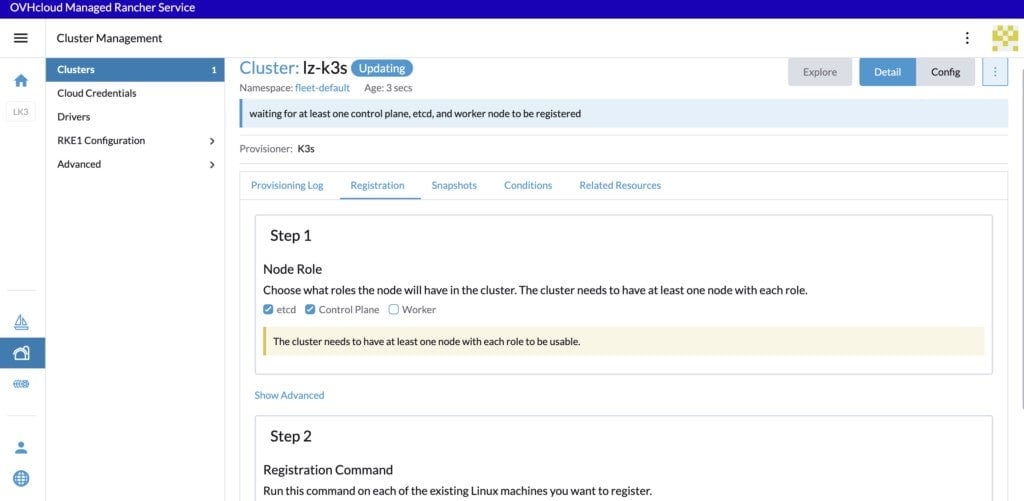
And copy/paste the registration command in a file.
For the configuration of our worker nodes, uncheck the checkboxes and check only the Worker checkbox:
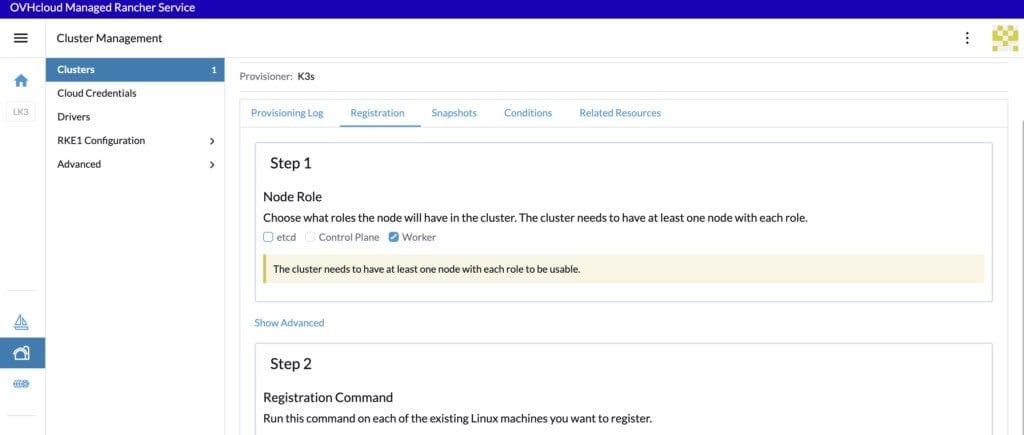
And copy/paste the registration command in a file.
In the OVHcloud Control Panel, click on the Instances button.
Fill the search box with the beginning of the name of our instances: lz-kube.
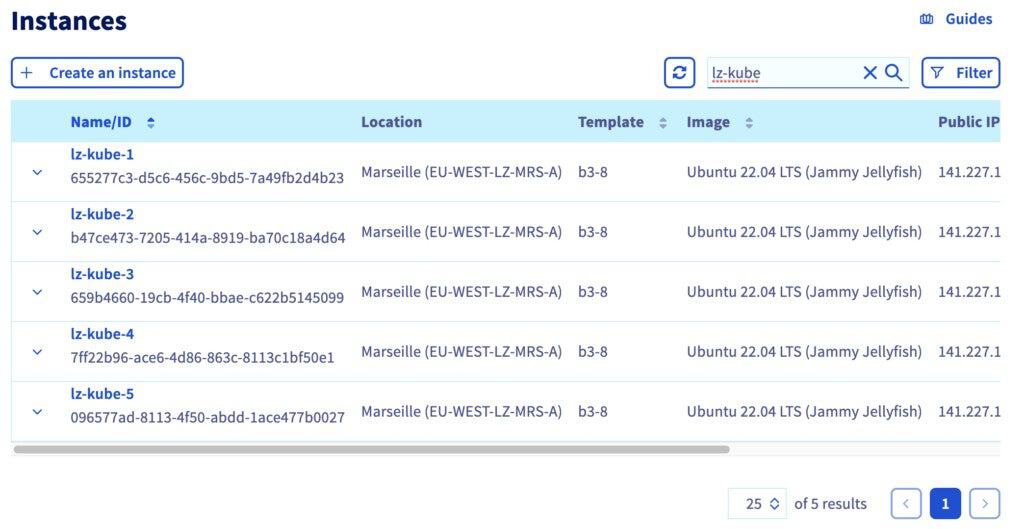
For the first three instances, pick the Public IP addresses and then in your local terminal connect you in ssh and copy/paste the first registration command (for etcd and control plane nodes):
$ ssh root@xxx.xxx.xxx.xxx
The authenticity of host 'xxx.xxx.xxx.xxx (xxx.xxx.xxx.xxx)' can't be established.
ED25519 key fingerprint is SHA256:dqsdqsdqsdqsd/dqsdqsdqsdqsdqsdqsdq.
This key is not known by any other names
Are you sure you want to continue connecting (yes/no/[fingerprint])? yes
...
root@lz-kube-1:~# curl -fL https://dsqdsqdqsd.p7mg.rancher.ovh.net/system-agent-install.sh | sudo  sh -s - --server https://dsqdsqdqsd.p7mg.rancher.ovh.net --label 'cattle.io/os=linux' --token kbv5k48vc8thhgqqhmtd8tn55qtlpgw7jp4llm4m4tvnp9sznscmpf --etcd --controlplane
  % Total    % Received % Xferd  Average Speed   Time    Time     Time  Current
                                 Dload  Upload   Total   Spent    Left  Speed
100 30794    0 30794    0     0   156k      0 --:--:-- --:--:-- --:--:--  157k
[INFO]  Label: cattle.io/os=linux
...
And for the last two instances, pick the Public IP addresses and then in your local terminal connect you in ssh and copy/paste the second registration command (for worker nodes):
$ ssh root@xxx.xxx.xxx.xxx
The authenticity of host 'xxx.xxx.xxx.xxx (xxx.xxx.xxx.xxx)' can't be established.
ED25519 key fingerprint is SHA256:dqsdqsdqsdqsd/dqsdqsdqsdqsdqsdqsdq.
This key is not known by any other names
Are you sure you want to continue connecting (yes/no/[fingerprint])? yes
...

root@lz-kube-4:~# curl -fL https://dsqdsqdqsd.p7mg.rancher.ovh.net/system-agent-install.sh | sudo  sh -s - --server https://dsqdsqdqsd.p7mg.rancher.ovh.net --label 'cattle.io/os=linux' --token kbv5k48vc8thhgqqhmtd8tn55qtlpgw7jp4llm4m4tvnp9sznscmpf --worker

  % Total    % Received % Xferd  Average Speed   Time    Time     Time  Current
                                 Dload  Upload   Total   Spent    Left  Speed
100 30794    0 30794    0     0   156k      0 --:--:-- --:--:-- --:--:--  157k
[INFO]  Label: cattle.io/os=linux
...
Wait until the cluster is in Active state.
Connecting to the cluster with kubectl CLI
In Rancher UI, click on the lz-k3s cluster.
Then click on the Download KubeConfig icon to download the kubeconfig file and save the path of kubeconfig in an environment variable:
$ export KUBE_CLUSTER=$(pwd)/lz_k3s.ymlTest the connexion to the Kubernetes:
$ kubectl --kubeconfig=$KUBE_CLUSTER cluster-infoList the nodes:
$ kubectl --kubeconfig=$KUBE_CLUSTER get no

NAME        STATUS   ROLES                       AGE     VERSION
lz-kube-1   Ready    control-plane,etcd,master   9m9s    v1.27.14+k3s1
lz-kube-2   Ready    control-plane,etcd,master   9m28s   v1.27.14+k3s1
lz-kube-3   Ready    control-plane,etcd,master   10m     v1.27.14+k3s1
lz-kube-4   Ready    worker                      8m59s   v1.27.14+k3s1
lz-kube-5   Ready    worker                      9m      v1.27.14+k3s1
Conclusion
We deployed and configured a Kubernetes cluster in Compute Instances on Local Zones with the new Managed Rancher Services and we discovered how to connect to it.
During the Beta phase, MRS is free so don’t hesitate to test it.
Want to go further?
Visit our technical guides and how to about OVHcloud Managed Rancher Service.